The Driver Syndicate/Vehicles/Creating Vehicle Models
Preparing a Car Model for Import
The following information is about preparing a Vette model that already exists for the Eqiulibrium [sic] Engine
Allignment
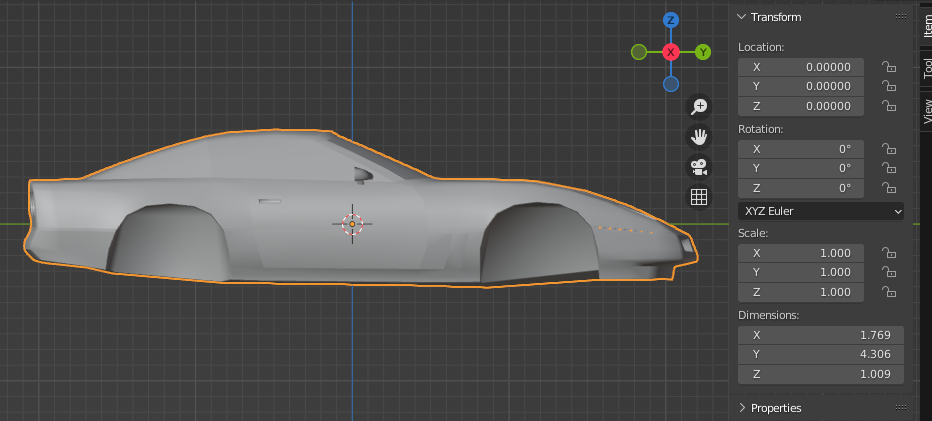
When adding a car, make sure that it's pointing towards the Y.
Cars in the Driver Syndicate are roughly 1:1 in meters.
By default, exporting FBX will not apply the model's Transform, Rotation and Scale.
Popup headlights are a separate model within the same .blend file.
Textures
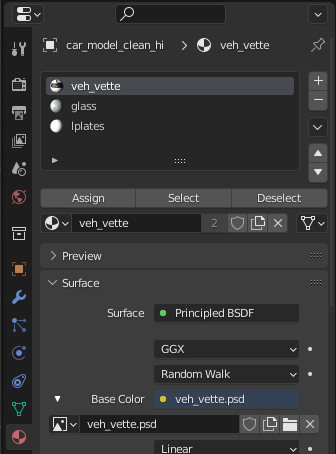
A .mat file tells the game what the names of the textures are for a model to use.
A .mat file also tells the game whether a texture should have a reflection, glow, be transparent etc.
When exporting to FBX, the name of the .mat files that the game looks for are given by the material names in Blender.
glass and lplates are used for vehicles' windows and license plate textures.
Materials/textures that are unique to the vehicle can have any name, but should be named after the vehicle, and not be the same as any other materials/textures.
Armature
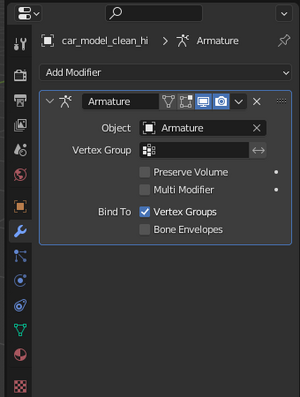
An Armature must be added for a vehicle to have cosmetic damage.
Vehicles also need to have an Armature modifier that points to the armature.
Copying the Vette's or the Carla's armature, and pasting that into your model's scene works too.
Rigging
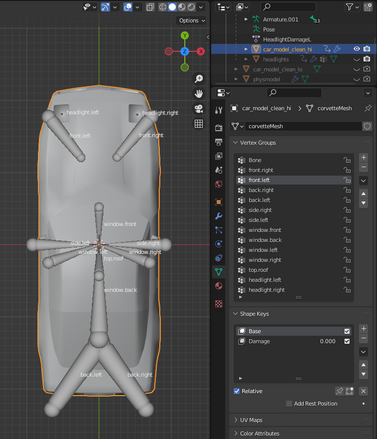
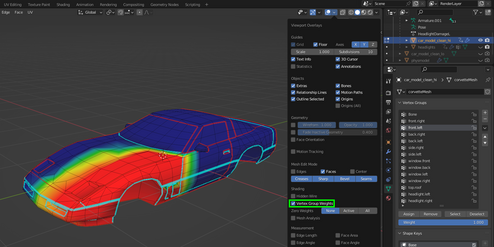
A car must have vertex weight groups that correspond with the names of the bones from the armature.
Areas of the vehicle can be assigned to vertex groups either by highlighting them in Edit Mode and clicking Assign, by using Weight Painting, or with a combination of the two.
Weight groups should be assigned in the correct area for each bone.
The center for the front and back of the car should be assigned for the front and back bones.
Popup headlights do not get assigned to the front bones, they get assigned to headlight.left and headlight.right
Damage Model
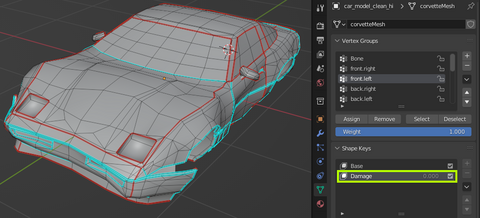
A shape key, generally named Base or Basis, is used as the regular, undamaged shape of the car.
A damage shape key named Damage is used for the damage of Driver Syndicate vehicles.
Usual ways of creating a Damage shape key are:
- Moving the front and back bumpers towards the center of the car
- Flaring out the quarter panels
- Moving the center rows of the hood and trunk up
Exporting to .fbx
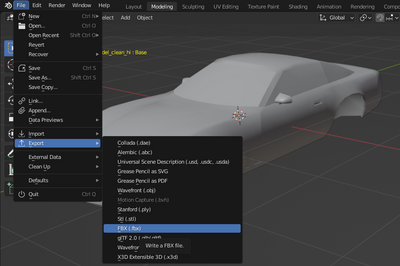
FBX is the superior way to export a car to the program that exports cars to the Driver Syndicate.
Reasons to use FBX over .esm:
- Works in newer versions of Blender
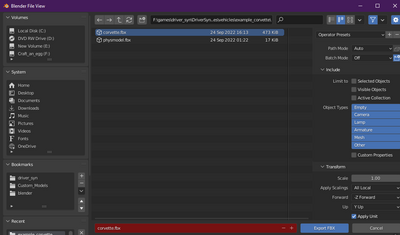
Blender's default settings for exporting to fbx usually work well enough, this will put every model into one .fbx file.
Exporting to .egf
.egf is the file format of 3D models for the Driver Syndicate.
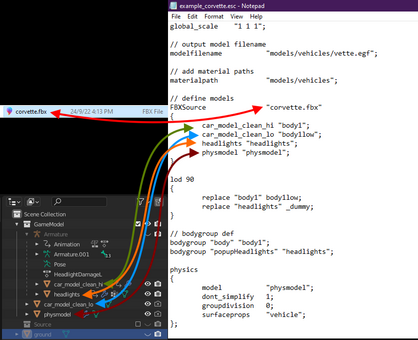
A .esc script tells EGFMan what a model is.
A .esc script can be edited in text editors such as Notepad
EGFMan reads a .esc script to do the following:
- Read the .fbx file
- Turn a model inside the .fbx into a .egf
- Turn a model inside the .fbx into a .pod (physics model)
- Turn a model inside the .fbx into a bodygroup (things like spoilers, roofs on convertibles, so they can be turned on and off)
- Turn a model with a shapekey (damage) inside the .fbx into a .egf
